Defining a Freight Method on KommerceServer
Once you have defined the freight carriers, you will now want to define the freight methods for each carrier that you are using in your store. Each freight method defined will be displayed as a shipping option for your web users during checkout. You can view and add new freight methods on the Freight Methods page. The following image displays an example of the Freight Methods page.
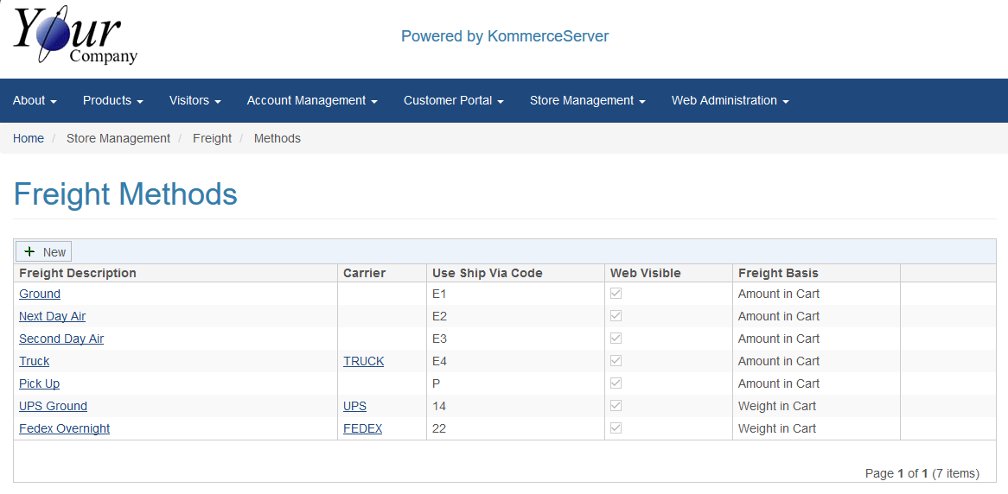
Perform the following steps to define a new freight method.
- Navigate to the Freight Methods page by selecting Store Management>Freight>Methods. The Freight Methods page opens.
- Click the New button. The Freight Definition page opens.
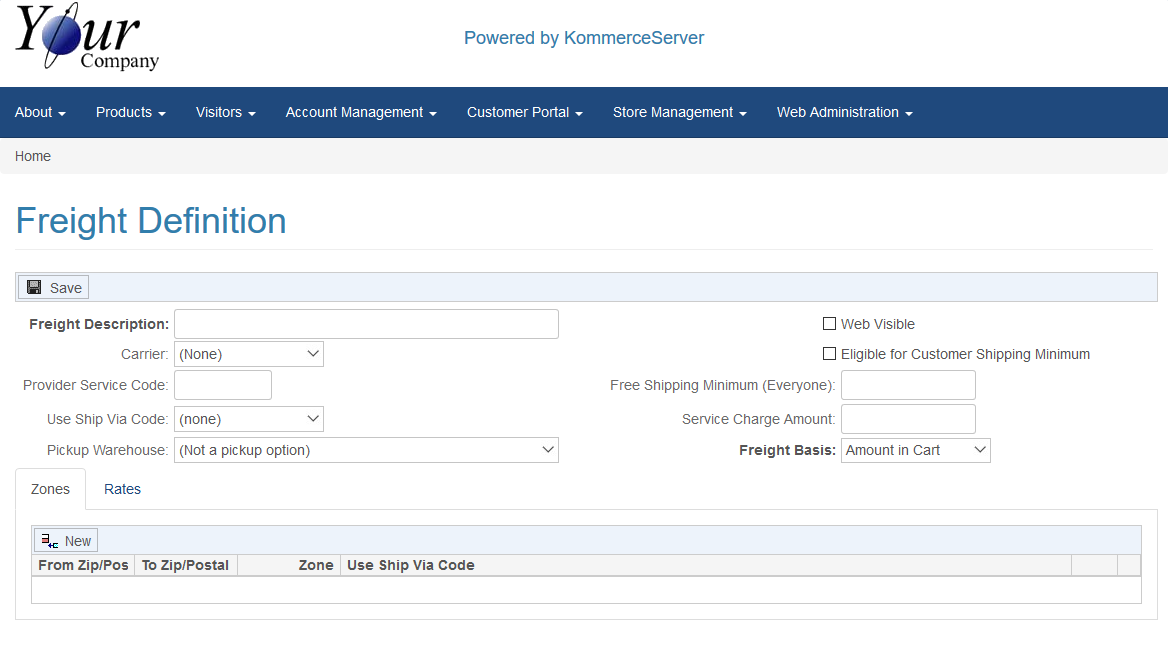
- Enter a description for the shipping method in the Freight Description field
(e.g. UPS Ground). The description you enter here is what your web customers will see on the checkout page. - Select a shipping carrier from the Carrier drop-down menu. This will determine how freight will be calculated, depending on the carrier you select.
- The Provider Service code is only needed when the carrier selected is defined to calculate freight using a third party provider (e.g. Federal Express). If this is the case, enter the carrier-specific service code in the Provider Service Code field. Refer to Third Party Freight Service Codes for detailed service code information for the supported carriers. If the carrier selected is not using a third party provider, leave this field blank.
- The Use Ship Via Code field is a drop-down menu of all the back office codes sent by the KS_FREIGHT API. Select the Ship Via code that should be used for web orders that choose this freight method. This is necessary for integration purposes when orders are sent to the back office.
-
(Optional) If this freight method being defined is an option for your customers to pick up their order from a particular branch warehouse, you must select the branch warehouse from the Pickup Warehouse drop-down menu.
In order to use the Pickup Warehouse option, you must first define an inventory agency with an associated branch location. For more information, refer to the KommerceServer Agencies Overview topic.
- If you want this shipping carrier to be visible to web visitors at checkout, select the Web Visible checkbox.
- (Optional) If you want to offer free shipping for your customers that use this freight method based on a minimum purchase amount, you can enter the minimum purchase amount in the Free Shipping Minimum field.
- (Optional) If you want an additional shipping charge on top of the calculated freight cost, you can enter it in the Service Charge Amount field. For example, if you wanted to add a $10 service charge on top of your calculated freight cost, enter 10 in the Service Charge Amount field.
- Select a basis for which you want KommerceServer to calculate freight in the Freight Basis drop-down menu.
If you are using a third party provider interface to calculate the freight cost, the freight will be calculated by weight regardless of the option you choose in the Freight Basis drop-down menu.
The following steps only apply if you are using the KommerceServer internal freight calculation method
-
You can create shipping zones based on zip code ranges. During checkout, if an order is not being shipped to an address within any of the defined zone(s) of a freight method, it will not show up as a shipping option. For each zone defined, you must now define the shipping rates based on ranges of either the weight or value of the items in the cart. Multiple ranges can be defined for each zone. Perform the steps below to assign zip code and rate ranges to your freight method.
- On the Zones tab, click the New button to add a new zip code zone.
- Enter the zip code range in the From Zip/Postal and To Zip/Postal fields.
- Assign a zone number to the zip code range in the Zone field. You can assign multiple ranges to the same zone.
- If want a different Ship Via code other than the one defined in the Use Ship Via code field above, select the desired code in the Use Ship Via Code drop-down menu.
- To create a new zip code range, click the New button.
- Repeat steps b through e until you have defined all of your desired zip code ranges.
- To define the shipping rate(s) for each zone based on ranges of either weight or value of the cart items, click the Rates tab.
- Click the New button to create a new shipping rate range for a zone.
- Enter the zone you want to set a rate for in the Zone field. The zone you enter here should correspond to the applicable zone number you entered on the Zones tab.
- The Minimum Range field enables you to enter a minimum amount or weight, depending on the option you selected in the Freight Basis drop-down menu.
- The Maximum Range field enables you to enter a maximum amount or weight, depending on the option you selected in the Freight Basis drop-down menu.
- Enter a freight rate amount for the corresponding range defined in the Freight Rate field.
- To add another shipping rate range, click the New button.
- Click the Save button to save your freight definition.