The Kourier website can be secured from unauthorized access by implementing standard .net security features associated with any Microsoft Internet Information Services (IIS) application. This article discusses the configuration changes you must make to enable these features.
The example below is based upon Windows Server 2008 R2 and Microsoft Internet Information Services version 7.5 where we will limit access to the Kourier website to only those users that are part of a Windows group named "kourier_user".
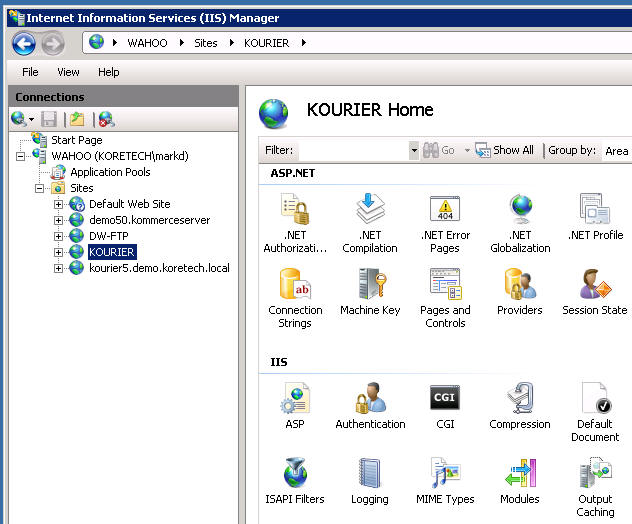
Open the IIS Administration application and in the Sites node, double-click the Kourier website. You should see a display similar to this:
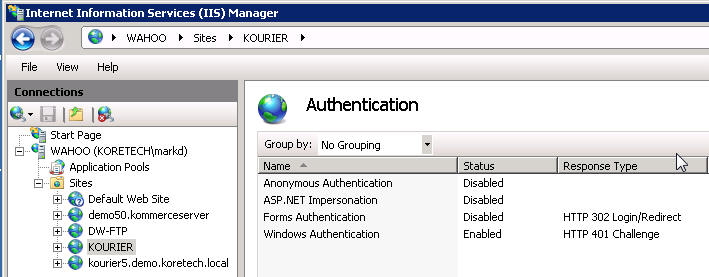
Double-click the Authentication icon and you will see the Authentication
groups window.
Now right-click on the Windows Authentication name and select "Enable" from the popup menu (as show below):
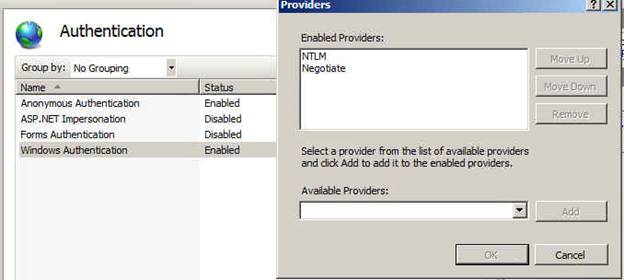
Then right-click on Windows Authentication again and select "Providers..." from the popup menu.
In the Providers window, highlight NTLM and use the Move Up button to move it to the top of the list as shown below. Click OK to save your changes.
Open the web.config file (typically located at <drive>:\Program Files (x86)\Kore Technologies\Kourier Integrator\Koretech.Kourier.Main ) using an application such as notepad. Change the mode attribute for the element "authentication" from "none" to "Windows" to turn on Windows authentication.

Under the authorization element:

Save the changes. Note: Depending upon how your website has been configured you might need to change permissions on the web.config file before you will be allowed to save these changes.